| Tools: |  |
Phillips Screwdriver |
| 10mm box wrench | ||
| Hammer | ||
| Materials: | Rod and Pipe, Shield(86336-14370) | |
| Cable, W/Antenna(86327-22211) | ||
| White Lithium Grease |
Removal Instructions
| 1. | Open the rear hatch and prop up the board over the spare with the prop. Also remove the access door on the antenna side and remove the small cargo bin by removing the two phillips screws holding it in. |
| 2. | Using a phillips screwdriver remove the two screws on the side of the spoiler section. As you can see in the next picture there are two spots in the middle of the spoiler where little barb things go through to secure it to the body. Mine didn't have anything on the inside holding it down so I was lucky and it lifted right off. If yours does you have to very careful pry the spoiler up. This risks breaking is which I have heard happen. If you don't want to risk this you can take off all that inner trim and remove the things securing the barbs on the inside. This will take more time, but you will also save some time since it will be very easy to remove and reinstall the antenna. Since mine didn't have this problem I went the pull it through the hole route. |
| 3. |
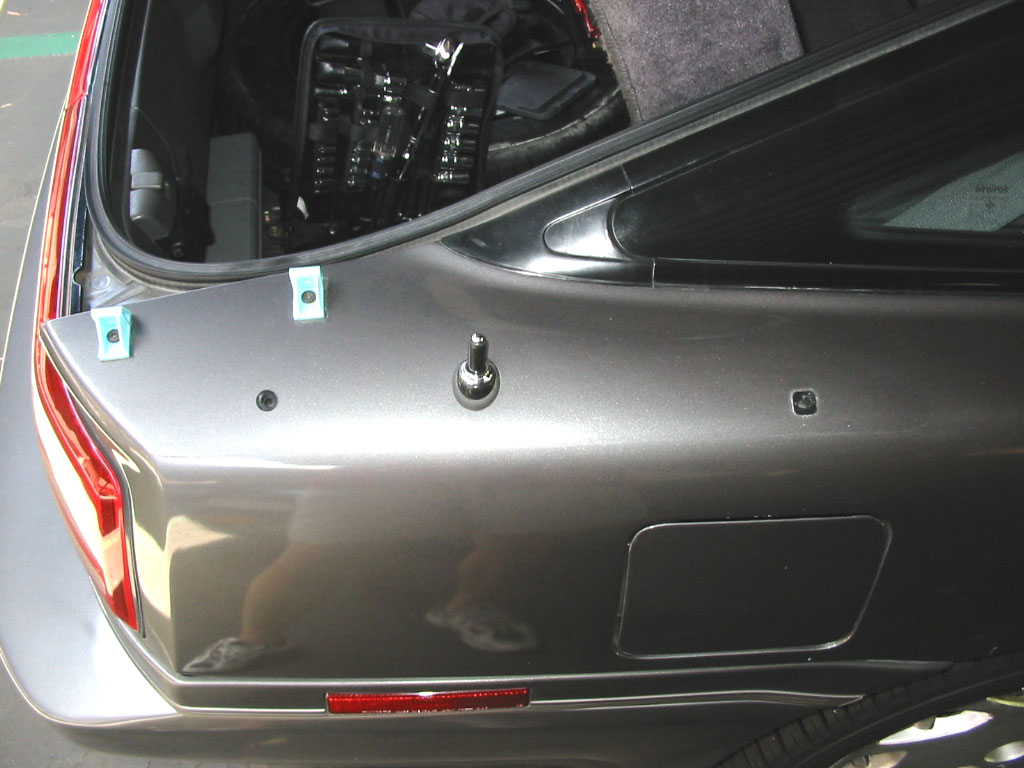 Unscrew the top "4 notched" bolt that secures the antenna to the body. You might have to use a pair of pliers if that sucker is on good.
|
| 3a. | If your antenna is stuck in the up position you will want to remove the "mast" section before continuing. To do that pull the black thing that protrudes above the 4 notched bolt up and then the mast should be able to retract back "up". Then unscrew the antenna part from the nylon cord. Attach the new mast assemble and retighten the 4 notched bolt, and use the radio to power the antenna up and down a couple of times and you should be done, you got the easy part. If the nylon cord is broken below where it attaches to the mast you have to pull it all out. |
| 4. | Using a 10mm box wrench loosen the two 10mm bolts holding the base of the antenna to the mounting bracket. These are hard to get to but they shouldn't be on too tight. You will probably drop your wrench but it shouldn't be too hard to retrieve depending on the size of your arms. I used a magnetic grabber to hold the wrench while I positioned it. |
| 5. | Now the antenna is loose and you should be able to maneuver it around. Next unplug the electric connector to the blue relay box and the two rubber drain hoses. |
| 6. | To get it out of the hole it is easier to first remove the blue relay box. Using a 10mm wrench remove the retaining bolt and take the box off and remove it from the hole. |
| 7. |
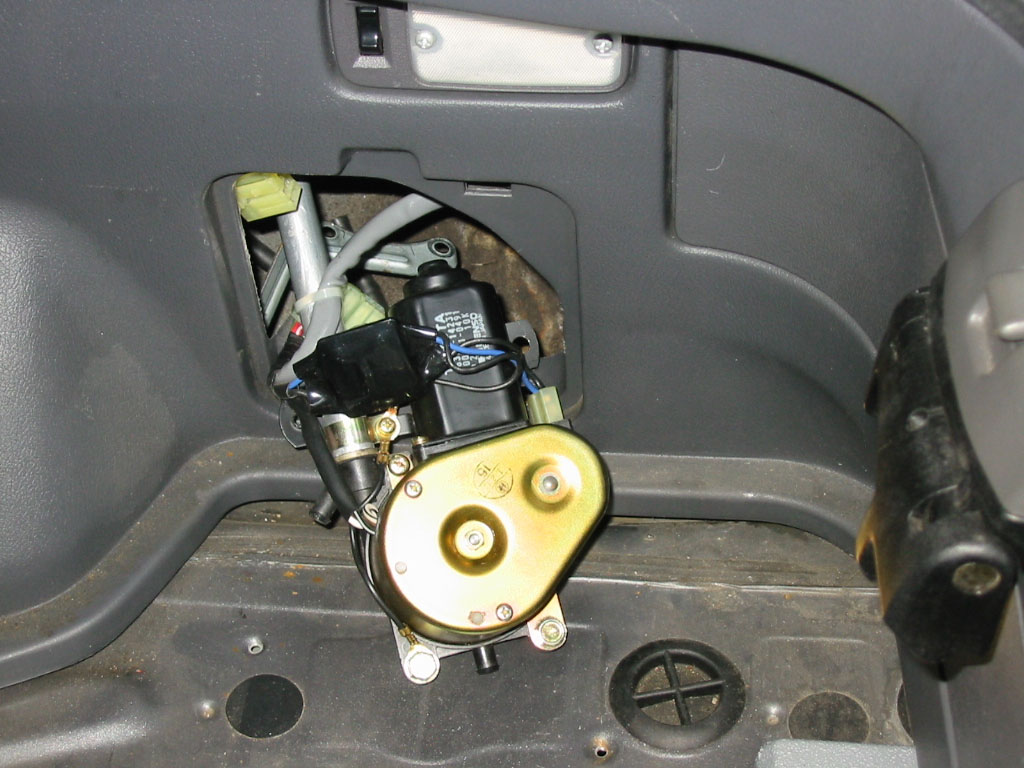 Now maneuver the rest of the assembly around until it comes out. This took be a few minutes but shouldn't be too hard.
|
| 8. | Reach around inside the compartment on the bottom to check for any stuff. I found a bunch of junk like rocks and dried mud pieces. |
Rebuild Instructions
| 1. |
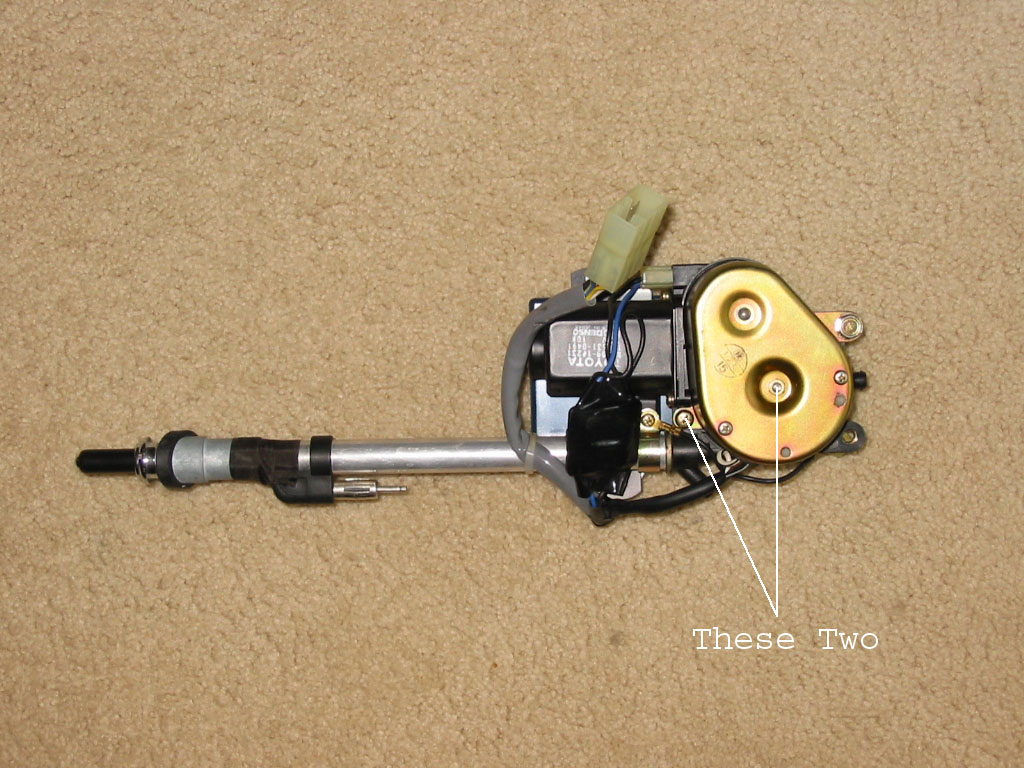 Remove the small bolt and screw that hold the metal housing on and pull the metal housing off.
|
| 2. |
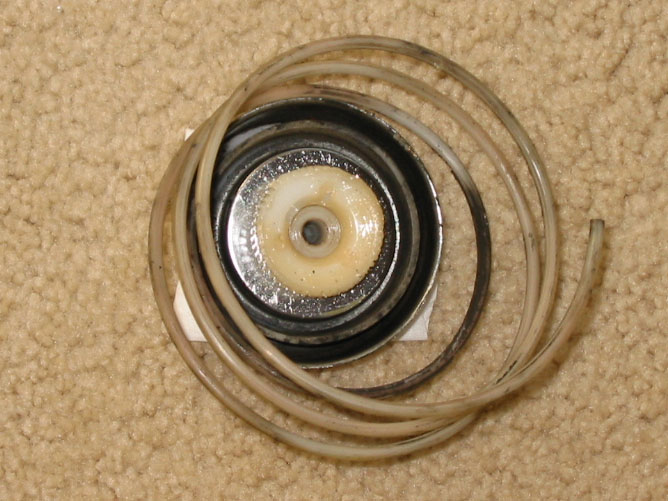 Pull the Nylon cord assembly out. The cord is tightly wound around so do it carefully. When you get it off cut the cord, if it isn't already broken. There was a lot of plastic shavings and junk that I cleaned out of the antenna assembly after I pulled this off.
|
| 3. |
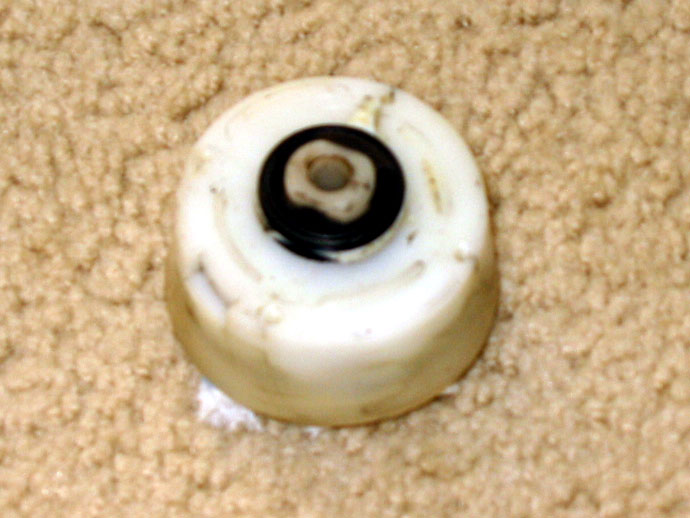 Remove the 4 screws on the Nylon Cord Assembly and pull off the old chrome piece with the cord.
|
| 4. |
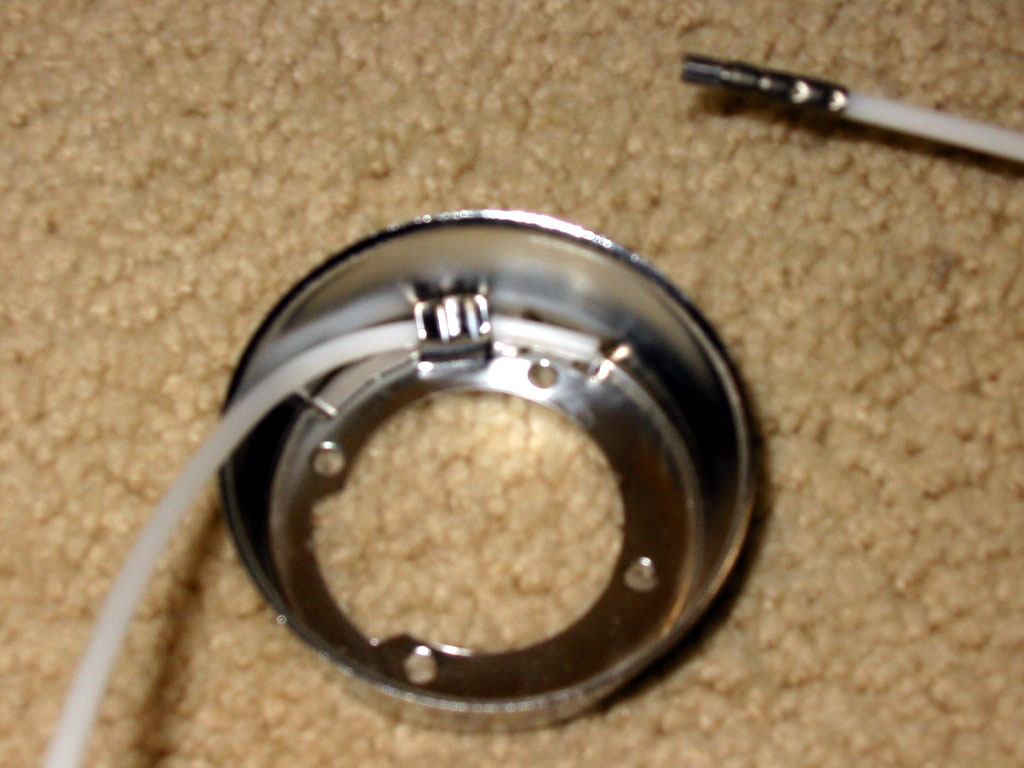 Take the new chrome assembly piece and thread the nylon cord through like the old one was. Using a hammer and something like a screw driver crush the metal covering on the inside down against the nylon cord so it is very secure. If this doesn't hold it you will be doing it all over again. It is pretty tough to whack down so use a good size hammer.
|
| 5. |
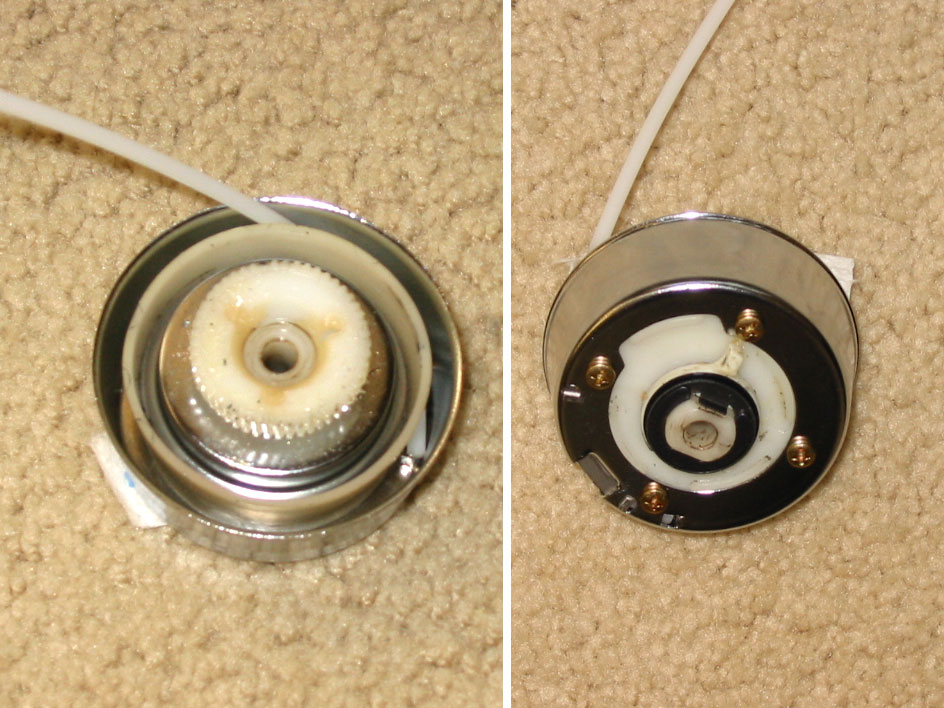 Using the 4 new screws install the new nylon cord assembly back on the thingy the only one came off.
|
| 6. |
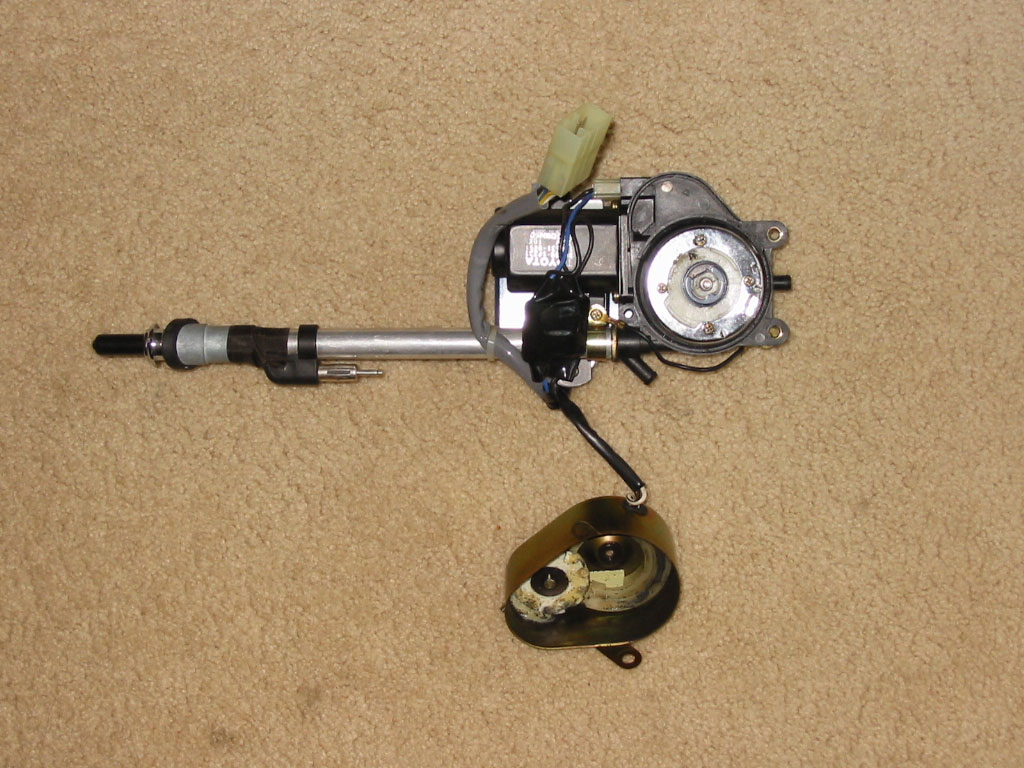 Feed the nylon cord though the bottom of the antenna assembly and take up most of the slack as if it was fully extended. Place the chrome assembly back on the antenna assembly adjust the nylon cord to move freely. Press it down so it seats well. (Lithium Grease)
|
| 7. | Replace the metal housing with the securing nut and the small screw. Make sure it seats well in the antenna assembly. Also screw the mast connector to the nylon cord slip the metal sleeve over the top of the antenna. The antenna should look like it is extended. |
| 8. | Now you are going to test and retract it at the same time. Go out to the car and have one friend hold the antenna. With the car off plug the blue box back in. Turn on the car then turn the radio on for 0.5 sec then off. When you turn it off the antenna should start to retract. It stops automatically when the load of the motor signals it is done. I had to send it up and down twice before it got back to normal. Once it is "normal" again finish with it fully retracted. Turn off the car and disconnect it from the blue box again. This also tests that it all works right. |
Reinstallation Instructions
| 1. | Make sure you have tested it as mentioned in the last section. |
| 2. | Maneuver the antenna back in the hole and connect the two drain tubes while it is still free to move. |
| 3. | Reattach the blue relay box and tighten the 10mm bolt. |
| 4. | Maneuver the antenna around until you can get the mast section to protrude out the top and the bolt holes to line up on the bottom. This is a fun game. When you get it about right put the "4 notched" bolt on the top of the antenna tight enough to hold it without falling. |
| 5. | Now secure the antenna to the lower support with the two 10mm bolts. |
| 6. | Now hand tighten the top 4 notched bolt. |
| 7. | Reconnect the blue box electrical connector and plug in the antenna wire. |
| 8. | Turn on the radio and test it again. |
| 9. | Put the spoiler section back on and tighten the two screws holding it to the body. |
| 10. | Replace the access door and storage bin. |